Page 12 of 20
Re: Jo's Stitching 2023
Posted: Tue Jul 25, 2023 9:26 am
by Steam.Jo
Having a fondle of my stash yesterday cause me to have a magnetic attraction to my Cow Parsley kit. So as a little side line I decided to edge the fabric and mount it.
Having purchased 2 of the easy clip frames its about time I used those. This was a bad idea: I normally use taped rollers and line up the holes in the fabric with the edge of the tape (having already made sure the tape is parallel with the rollers) and stitch the fabric to the tapes following the holes. I gave up trying to clip 36 count linen onto the frame: The problem being you have to put the back of the clip in then roll it round the roller so when you go to put the next clip on the holes in bit you need to line up on is in the groove under the clip. These might work ok for Aida but not for lining up linen. So I have mounted it on a taped frame:
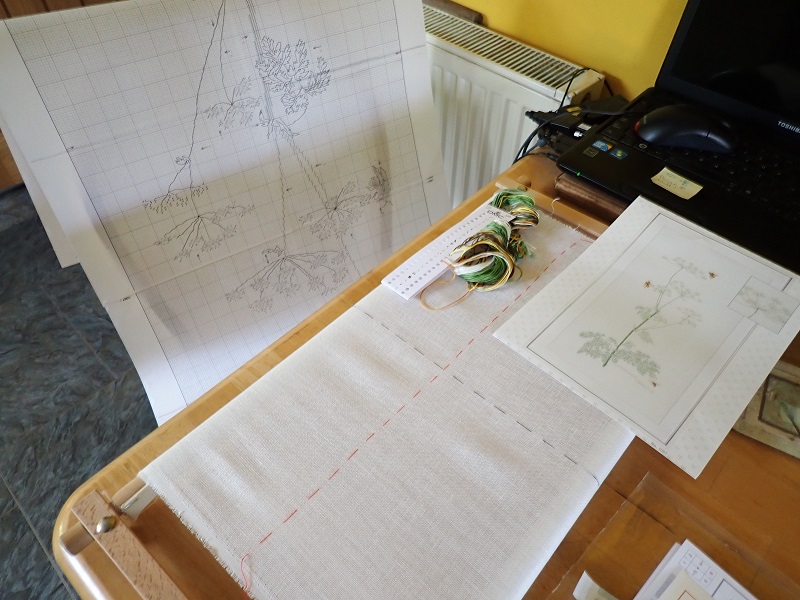
I knew it was not a good day when having photocopied the chart on trying to stick it together I found the printer had missed one stitching row off each sheet

So I penned in the few missing details.
I colour matched all the threads with the DMC thread chart and wrote the colours on the back of the chart so the last thing to do is work out the symbols for the beads. The chart only shows the symbols for the stitching and all the symbols match the ones on the thread card so where were they

Close inspection under a magnifier of the picture on the front of the package shows that the beads locations corresponds to each of the stitches in the colour Blanc. They could have said this in the instructions

While I am having a whinge

the back of the packet says this kit is 195" by 102". How on earth would you hold a piece of fabric 8 1/2 feet wide.

Thankfully they fibbed. The metric dimensions of 77 by 40 cm are correct.
Jo
Re: Jo's Stitching 2023
Posted: Tue Jul 25, 2023 10:41 am
by Mabel Figworthy
It's annoying when instructions are incomplete (or worse, incorrect). I've just turned a corner using a type of edging stitch which had the sequence of stitches explained with numbers on a diagram, until it came up to the corner when you're left to your own devices
Well done you for working everything out and getting it set up!
Can I ask you something about the roller frame? I'm doing one-on-one goldwork with a lady at the moment and I find that it is almost impossible to keep drum-taut tension vertically (i.e. between the rollers) however tight we get the wingnuts (horizontal tension is fine as the fabric is laced to the stretchers). How do you keep the tension on these?
Re: Jo's Stitching 2023
Posted: Tue Jul 25, 2023 1:32 pm
by Steam.Jo
Mabel Figworthy wrote: Tue Jul 25, 2023 10:41 am
Can I ask you something about the roller frame? I'm doing one-on-one goldwork with a lady at the moment and I find that it is almost impossible to keep drum-taut tension vertically (i.e. between the rollers) however tight we get the wingnuts (horizontal tension is fine as the fabric is laced to the stretchers). How do you keep the tension on these?
The first thing I do is replace the wing nuts with M5 threaded Knobs on all of my roller frames. It is extremely difficult to tighten the wing nuts sufficiently by fingers alone. Elbesee have realised this and they do a tool to tighten the wing nuts with. I prefer to replace the wing nuts.
Having stitched one side of the fabric on to a roller. I loosely wind the excess round the other roller while I stitch the opposite end on the other roller. Now that both sides are stitched on the tapes I lightly tighten one set of roller clamps then roll the fabric from that stiff roller onto the second roller. I then lightly tighten the second roller and wind all the fabric back onto the first roller. What this does is make sure the fabric is tight on both rollers - any bagginess will allow the work to sag. I then roll the fabric to the place I wish to start still with some tension on the roller with the fabric on it to maintain tension. Finally clamping one set of roller clamps, then tightening each of the other clamps once I have given the fabric one last tweak tight. If I need to leave a piece of work for any time I will loosen the clamps on one side to avoid damaging the fabric.
With huge pieces of material which need long rollers like my HAED Seasons there can be a lot of tension and I have found using shorter side frames can help keep the tension.
Hope that helps Mabel.

Jo
Re: Jo's Stitching 2023
Posted: Tue Jul 25, 2023 2:04 pm
by Mabel Figworthy
Thanks Jo - the fabric in question is not actually rolled on the rollers, well, hardly - about half a turn top and bottom. She does have a twizzler to tighten the wingnuts, but with the stress that goldwork puts on the fabric it does seem to pull the rollers enough to loosen the fabric a bit. It's still reasonably tight, just not the drum taut finish that that type of embroidery needs.
I'll mention the threaded knobs to her as an option, thanks. She is also considering getting a small slate frame, where the rollers are held in place with split pins pushed through the stretchers so they physically cannot slacken.
Re: Jo's Stitching 2023
Posted: Tue Jul 25, 2023 2:39 pm
by Steam.Jo
I always size the side bars so that I get 1 1/2 turns round the rollers so the fabric is gripping itself.
She could add extra stitching over the top of the rollers to apply extra tension just as you would around a slate frame

Jo
Re: Jo's Stitching 2023
Posted: Thu Aug 03, 2023 6:31 pm
by Steam.Jo
My new sewing magnifier has turned up so I am just checking it is a suitable height with my
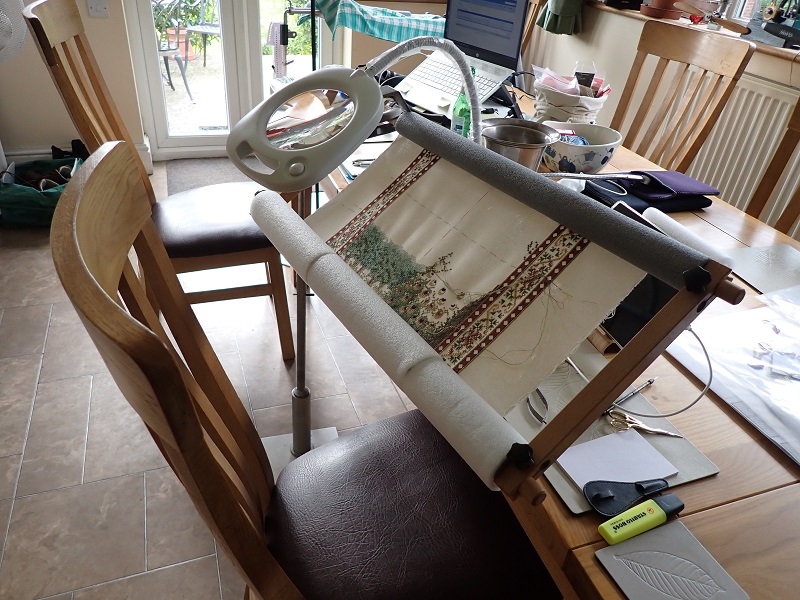
TW Peacock

I dug out some more thread/needle holders but it looks like I have run out of the JJ needles
Jo
Re: Jo's Stitching 2023
Posted: Fri Aug 04, 2023 7:33 am
by Serinde
Can't ever have enough needles.
I just noticed that you stitch "in the well". Must try that again (if I ever finish anything so I can start something new...).
Re: Jo's Stitching 2023
Posted: Fri Aug 04, 2023 9:58 am
by wendywombat
Serinde wrote: Fri Aug 04, 2023 7:33 am
Can't ever have enough needles.
I just noticed that you stitch "in the well". Must try that again (if I ever finish anything so I can start something new...).
I stitch that way too. Handy if you drop the needle!

Re: Jo's Stitching 2023
Posted: Fri Aug 04, 2023 12:03 pm
by Serinde
It would be, wouldn't it.
Re: Jo's Stitching 2023
Posted: Fri Aug 04, 2023 4:13 pm
by fccs
I have that same lamp/magnifier and I love it. It's several years old now and so far it's still working, although I have had to bring out the duct tape for parts of the bendy neck. And I also stitch in the ditch, always have. I find it's easier to end off the floss on the back as the hoop/bars/scrolls don't get in the way. And yes, it's also a decent needle (and bead) catcher. Plus, the fabric most exposed to hands and other surfaces is the back rather than the front where the design is stitched.
Re: Jo's Stitching 2023
Posted: Sat Aug 05, 2023 8:32 am
by Steam.Jo
As the Peacock Tapestry is back on the dining table I have found it too tempting and have been doing a little:
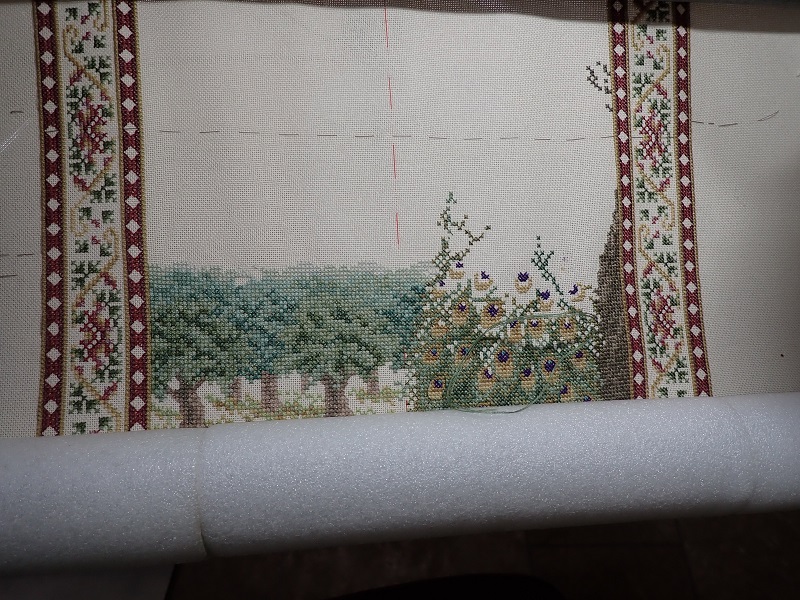
TW always says that this is her most difficult piece but having done the Celestial Dragon returning to this feels rather easier than it did the first time round.
I have given myself a challenge to finish off the last bit on the bottom enlarged chart sheet. There is a few stitches left by the arrow:
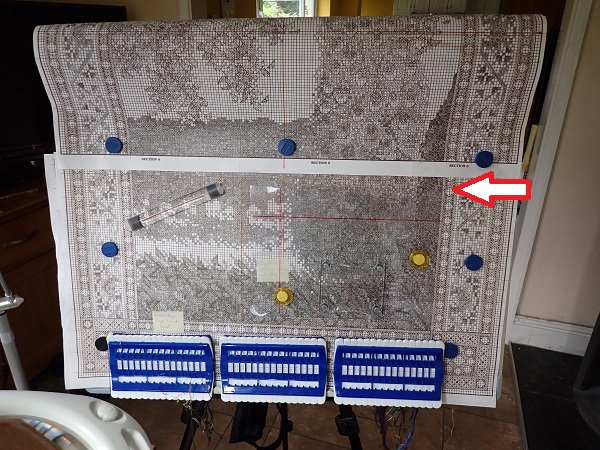
Once those few stitches are done I will be able to put that sheet away and there will be only another two to go
As you can see I rather like using the horrible looking plastic needle holders.
Jo
Re: Jo's Stitching 2023
Posted: Sat Aug 05, 2023 9:42 am
by Mabel Figworthy
Having done TW's teeny-weeny needle guardian I really appreciate the work that is going into this one!

Re: Jo's Stitching 2023
Posted: Sat Aug 05, 2023 1:35 pm
by rcperryls
As I have said quite a few times, stitching a TW piece takes a lot of patience and love. Until I started HAED pieces she was my favorite. I think I switched more because I got tired of so many fractional stitches and blended threads. But watching you stitch these makes me rethink that decision.
Carole

Re: Jo's Stitching 2023
Posted: Mon Aug 07, 2023 9:17 am
by Steam.Jo
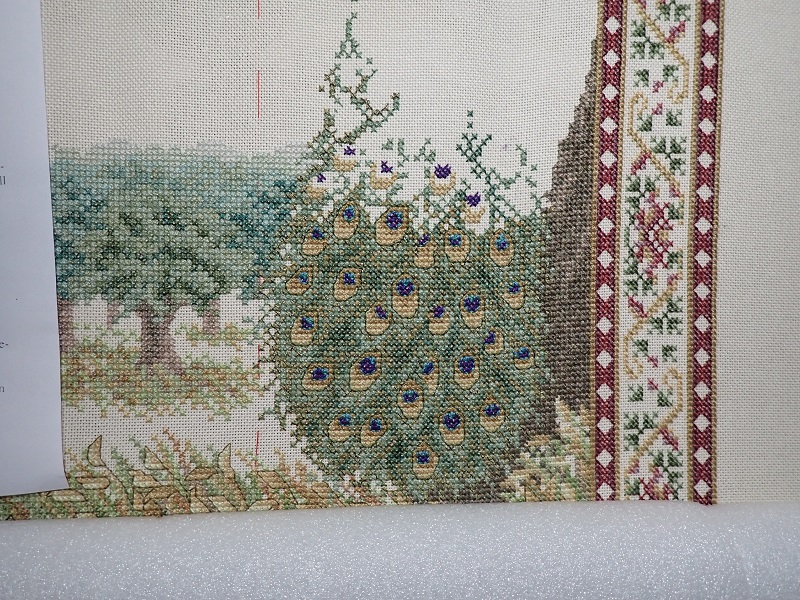
I was feeling very pleased with myself having finished the backstitching on the Peacock Tail on the bottom third of the piece:
Then I realised I had not done the backstitching on the background trees:
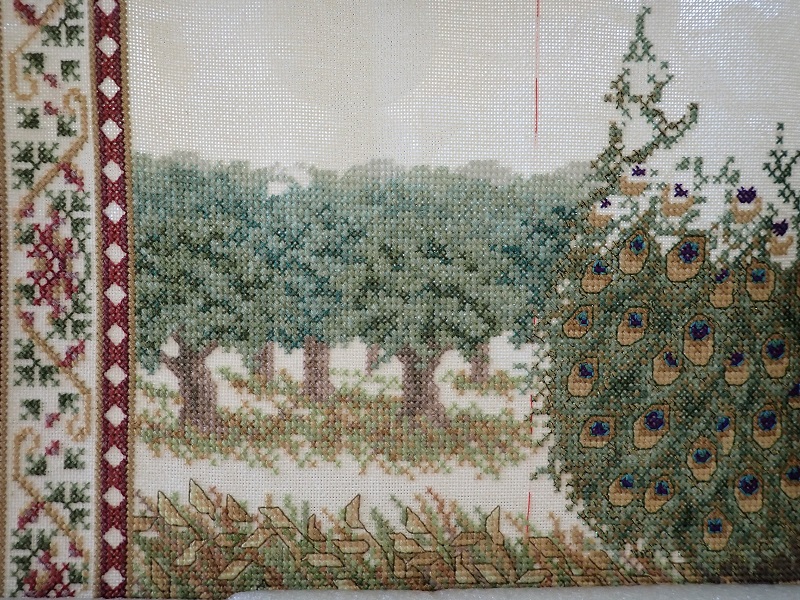
And even worse I have used the wrong stitches.
This is supposed to be done first half of the crosses in colour and the top half in a light colour. I will be adding the light colour half stitches (over the full stitches
) once I have outlined the trunk and leaves
Jo
Re: Jo's Stitching 2023
Posted: Mon Aug 07, 2023 12:18 pm
by Mabel Figworthy
It's called "clever adaptation of the design"
- and I'm sure it will look just fine. Just don't point it out to people when they admire your work!
Re: Jo's Stitching 2023
Posted: Mon Aug 07, 2023 2:37 pm
by rcperryls
Are you sure you need to even do that? The trees look lovely and will still look lovely once the backstitch is done. I know you will do the extra bit but it's worth considering.
Carole
Re: Jo's Stitching 2023
Posted: Tue Aug 08, 2023 4:08 pm
by Serinde
Right now, the trees look as if they are in the background -- the eye is drawn to the peacock -- with the outline stitch as required. The trees as they are at present do fade into the background, which is the idea. So why make work for yourself when the design brief has been met?
Re: Jo's Stitching 2023
Posted: Tue Aug 08, 2023 4:54 pm
by fccs
Serinde wrote: Tue Aug 08, 2023 4:08 pm
Right now, the trees look as if they are in the background -- the eye is drawn to the peacock -- with the outline stitch as required. The trees as they are at present do fade into the background, which is the idea. So why make work for yourself when the design brief has been met?
I absolutely agree!
Re: Jo's Stitching 2023
Posted: Tue Aug 08, 2023 4:55 pm
by Steam.Jo
I've just finished off all of the corrections:
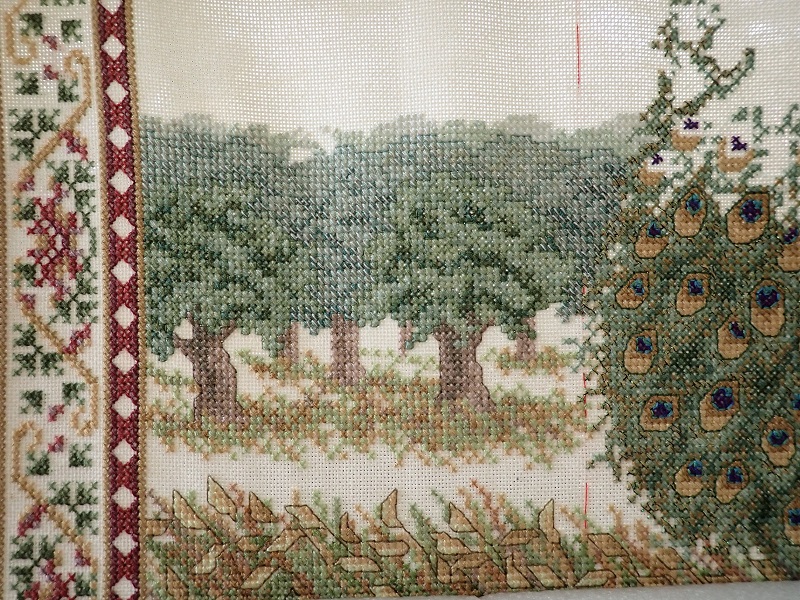
It looks better from a distance
The backstitching on the trees is as good as invisible and it took quite a while
Jo
Re: Jo's Stitching 2023
Posted: Tue Aug 08, 2023 6:35 pm
by Mabel Figworthy
I like the way there is that unoutlined green at the top, which keeps the distance effect!